Dark Souls Inlay
Published on: April 6, 2022
3 min read
Overview
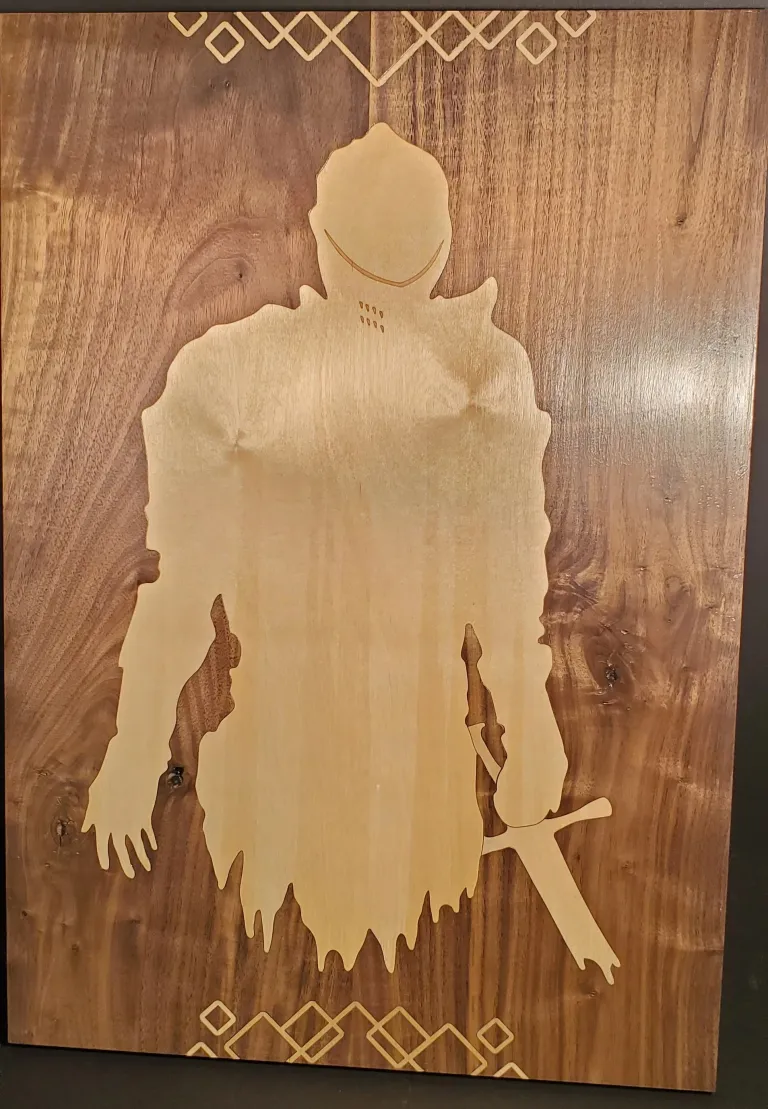
I’ve always been captivated by Bandai Namco’s games and their Dark Souls series is easily one of my favorite. I designed this 22.5x15” wall art piece to add flair and personality to my dorm as I head out for college. My inspiration for this piece came from the release (and my subsequent binging) of Elden Ring. I took ideas from hundreds of gritty fantasy illustrations made by other Dark Souls-enthusiasts. What turned out to be the most difficult part was trying to distill dozens of beautiful illustrations into just one or two ideas to go off of. Up until the final coat of poly, I was tinkering with different ideas and seeing whether I could incorporate more into the design. In the end, I kept the minimalist aesthetic and I couldn’t be more happy with how it turned out.
Design
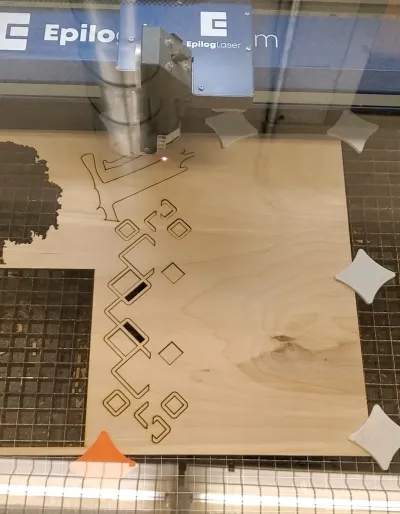
I adapted my design from artwork by Jeff Langevin, which I traced into line art using Adobe Illustrator. To fit the 1/8” CNC router bit, I redesigned the cape and flame since it would be impossible to preserve their details. Instead of these features, I recreated the right hand and left arm to fill the absence. I then rounded the rest of the corners to the size of the bit. I made the top accents by overlapping squares and building them into a single shape. I then duplicated these shapes into a separate layer to create the laser cut inlay. Since the Epilog Fusion Pro performs laser cuts, engravings, and raster etches, I used red, blue and black to mark the type of burn used. I drew the visor and mouthpiece with an etched interior and engraved outline to bolster their definition. Finally, I created a third manufacturing layer which compacted the inlay pieces into the smallest area possible and reduced wasted material.
Process
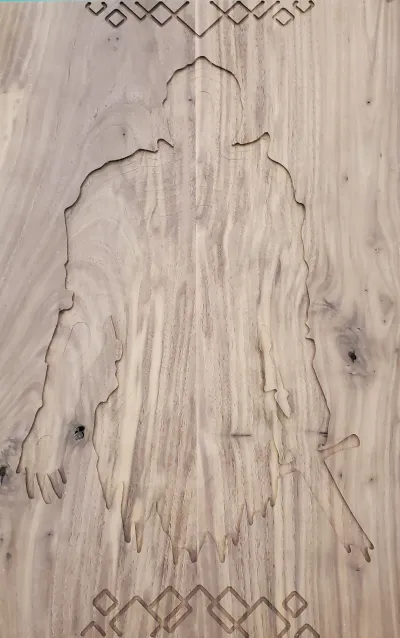
I used two contrasting woods for my project, black walnut for the body and 1/8” birch for the inlay. For the frame, I miter sawed two 23” boards from a 12’ plank. I then ran the sides of the board through a jointer until the edges became even. I used wood glue and clamped the boards together to create a tight and durable fit. I then planed the combined piece to a uniform 3/4” thickness to prepare for the CNC router.
I recreated my design in 3D with Autodesk Fusion 360 using the .dxf generated by Illustrator. I set a 1/8” depth cut for my vector art. Instead of using a single bit, I created two separate toolpaths for a 1/2” and 1/8” drill bit which saved over 30 minutes on manufacturing time.
To fill the inlay I laser cut the sword, knight, and accents. The kerf of the laser cut created a perfect fit, and I glued and hammered each piece into the recess. On the back, I cut a keyhole groove so that I could hang the board from a nail. I finally drum-sanded up to 220 grit and then applied 5 coats of polyurethane to seal the wood and create a polished look.
Resources
- Reference image: credit Jeff Langevin